
If you check out the CDC’s release of data concerning STIs, you’ll notice that cases of chlamydia have been declining- but it might be too soon to celebrate this news. Unlike other STIs, like gonorrhea,… More

Your daily dose of greens: a health & wellness blog
If you check out the CDC’s release of data concerning STIs, you’ll notice that cases of chlamydia have been declining- but it might be too soon to celebrate this news. Unlike other STIs, like gonorrhea,… More

If you have aches, suffered a strain, or had another type of muscular injury, you’ve probably heard some people tell you to “put ice on it” or to “add some heat to it.” If that… More

Cradle cap, otherwise known as infant seborrheic dermatitis, is a fairly common skin condition in infants. It’s benign and doesn’t cause any pain, itching or discomfort. Its symptoms are usually limited to appearance, and they… More

Using information from the Illinois Department of Public Health & Environmental Protection Agency, a study presented by Tirth Patel, MD, of Rush University Medical Center in Chicago and his colleagues, has found an association between high ambient air pollution and head and neck (H&N) cancers. Not the best news, especially if you live near highways and high traffic areas.
Patel noted that there was a “2.5 times greater risk of H&N cancers in the people who lived in [areas] where there were higher levels of diesel particulate matter — particularly oral and pharyngeal cancer.” He speculated that, although there are other factors involved, it’s likely that those pollutants cause changes that transform normal cells into cancerous ones.
How did they gather the necessary information for this study? Patel and colleagues used data from the 2014-2018 single-state cancer registry and identified cases of oral and pharyngeal cancers by zip codes. Once those zip codes were established, they then used the EPA tool to map where pollutant levels were highest. The main pollutants examined included “ozone, particulate matter of <2.5 micrometers in diameter (PM2.5), and diesel particulate matter.” No statistically significant associations were made between cancers and ozone levels, however, diesel particulate levels seemed to have an impact. (Diesel particulate matters are typically associated with trucking, which means they are greatest in areas near ports, freeways and railways.)
Air pollution has already been linked to asthma and lung cancers, and now we’re seeing a link to oral and pharyngeal cancers as well. Additional research will need to be done to establish a causal link, but this is just another example of how severe air pollution is affecting our world.
Here are just a few tips on how to decrease your footprint, and help clean our air:

Ventura County has a list of 50 things you can do to improve our air quality. You can check them out at: Ventura County Air Pollution Control District

This post isn’t going to be about making drastic changes, it’s about making changes that are doable. Baby steps that come together and add up lead to big changes that stick. So, here are 5 small steps you can take for your health. None of these things will make you go out of your way or have you buy any equipment or supplements. These changes are so very simple- and it’s a great place to start building on. Start building better habits today.
1. Replace one sugary drink with water a day.
Eventually, you’ll want the majority of your daily beverages to be water, but we have to start somewhere, and the smallest changes can set off the biggest effects. Maybe you have coffee with your breakfast, a soda with your lunch and another soft drink with dinner- switch one of those out with water. The ultimate goal: drinking half of your body weight in ounces (example: if you weigh 150 lbs, you’ll want to drink at least 75 oz a day).
2. Lights off by 11pm.
In reality this means no scrolling through your phone/social media in bed, no listening to podcasts, and no watching movies or videos in bed. Sleep is essentially the third pillar of health, along with diet and exercise. So, once your body hits the bed, it’s time to relax and fall asleep. According to the Sleep Foundation, healthy adults need between 7-9 hours of sleep. So if you have to be up by 7am, 11pm would be your bedtime. If you’re able to sleep in till later, adjust accordingly (also, lucky you!).

3. Brush and floss.
I know, I know. Sometimes you just want to skip a few steps to get to bed faster, but brushing and flossing are essential to your health- plus, you don’t want to be the person who doesn’t know that they have halitosis. If you skip flossing, plaque builds up, eventually leading to tartar which can irritate and inflame gums, causing periodontal disease. Tartar can cause your gums to recede, basically creating a gap between your gum and tooth, allowing a very welcoming space for bacteria and infection to enter your body (and it obviously causes tooth and gum decay). According to the American Dental Association, this type of gum disease has actually been associated with other ailments, such as heart disease, mouth cancers and diabetes.
4. Move around a few minutes every hour.
This is strongly recommended for those who sit for long hours at work. If you can’t convert to a standing desk, make sure you take a short walk to the restroom or at least stand up for 2-5 minutes every hour- those couple of minutes have actually been linked with a lower risk of dying from heart disease. For those who already exercise, you can add those extra 2-5 minutes at the end of your workout for a little boost. Don’t forget, exercise doesn’t just have to be walking, running or lifting weights- activities like gardening, vacuuming, or cleaning in general count too.
5. Eat 1 serving of veggies a day.
If you’re the type of person that cringes at the thought of fruits and veggies- now is a good time to start facing your fears. Clean essential vitamins, minerals and fiber come from these colorful foods, and your body needs them. According to a prospective study done by the American Academy of Neurology, just 1 serving of leafy greens (like kale, spinach, and collard greens for example) may actually protect your memory by slowing cognitive decline. A single serving is considered to be 1/2 cup of cooked greens or 1 cup of raw greens. Only 1/2 cup to 1 cup of greens to feel better and give your body some of the vitamins and minerals it may be missing (especially your daily Vitamin K needs)? That is so feasible! (Helpful hint: you can add that cup of spinach or kale to your smoothies or pasta sauces to hide its taste while still reaping its benefits).
If you know of any other tips we could add to the list, please comment and share them below!

Beautiful flowers have begun to bloom, pollen has started to circulate, and seasonal allergies are thriving. These type of allergies (aka hay fever or allergic rhinitis) can make people feel pretty miserable especially during spring and summer seasons.
If you’re wondering how allergens work- here are the cliff notes: allergens (like pollen, mold, ragweed or grass) float through the air and reach your nose, where the mast cells lining your nose mistake them for foreign, dangerous invaders. The cells release signals (chemicals/hormones) such as histamine, which round up even more immune cells to the battle. These chemicals also trigger those bothersome symptoms- most commonly:
So, how do you treat seasonal allergies? Many providers recommend OTC antihistamines or nasal sprays- but the tricky part is that they work best when you use them before the onset of your symptoms. In other words, you should be taking them in advance of anticipated symptoms. This means that you have to be aware of your triggers (e.g., specific allergens, seasonal timing, etc).

Some people don’t love the idea of taking meds that frequently, so it’s very much worth noting that there are also some natural remedies you can try as well. The best prevention is knowing your triggers and avoiding your allergens as best as you can, like tracking pollen counts and limiting outdoor time on those days, or even masking when you have to go outside on dusty/windy days. But here are 6 other safe, natural remedies you can try:
The biggest takeaway is this: to control allergies, you have to get a hold of the histamine release. For many, these remedies and antihistamines are enough to do the trick. However, if you notice your allergies continue to be severe, it may be worth having allergy testing done to identify your triggers and find better treatments. Allergen immunotherapy (essentially allergen desensitization) can also be a good option, so it’s something worth bringing up to your provider.

If you haven’t heard of Erewhon Market, you’ve probably heard of (or seen) Marianna’s coconut cloud smoothie. It’s made its rounds all over TikTok and Instagram, mostly because it looks so dang beautiful. The truth is, it’s trendy, it’s pretty- but it’s also $17. However– this is a health and wellness blog, and since it’s full of fruit, healthy fats, and spirulina, I thought it would be a good idea to find a way to make this at home, which in the long run will save you money since you’ll be able to make multiple servings with all your ingredients. Here’s what you’ll need for 2 servings- or 1 very large serving (no judgment):
How to:
1. Add 2 tablespoons of the coconut cream to the bottom of your glass. Use a spoon to swirl it around the cup.
2. Add all of the remaining ingredients to a blender, and blend until smooth. Pour it into the glass with the coconut cream. (It will be thick, so scrape down the sides of the blender as needed).
3. Enjoy!

Notes:
Hope this helps you increase your fruit and vitamin intake, and helps you save money on overpriced beverages!

Whoever said there’s no point in crying over spilled milk, clearly never breastfed. All those cliches used to describe breastfeeding are true- it’s beautiful, it’s scary, it’s rewarding, it’s dreadful, it’s natural, it’s foreign, but most importantly, it’s vital. Babies depend exclusively on milk for at least their first 5-6 months. Not only does it nourish them, breastmilk transfers essential antibodies to babies, helping them build and strengthen their little immune systems. Being someone’s diner 24/7 is a big weight to carry, especially since your body is simultaneously going through so many changes- organs are repositioning themselves, breasts are tender and learning to adjust to this new milk supply, bouts of clogged ducts and mastitis arise- and lest we forget, there’s a new little human to take care of on no sleep. So, just to really drive this point home- it’s not uncommon to cry over milk- because your baby depends on it, and every drop counts.
Which is why this is one of the most important “mom (especially first-time mom) hacks”:
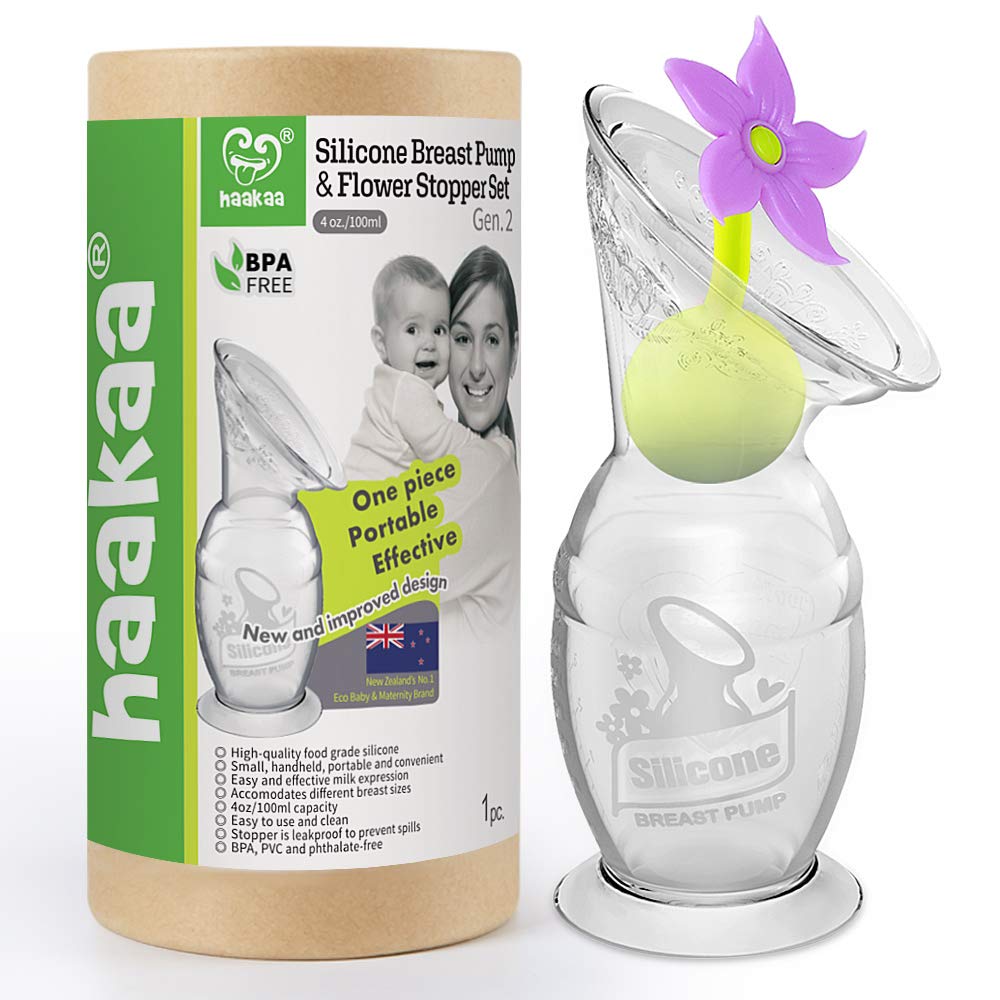
The haakaa.
Let me start by saying this is not a sponsored post- no one is asking me or paying me to write about this. This one comes from personal experience. I didn’t come across the haakaa until my baby was around 6 months old, and I wish someone would have told me about it sooner (like when I was doing my baby registry?).
When your baby latches on one side and you have your “let-down” reflex (when you feel your milk flow), both sides release milk. So, as your baby is drinking from one side, your other side is leaking. I was wasting valuable milk, having to change shirts with each feed, and having to add extra pump sessions to make sure I had enough milk for him when I was away on clinical rotations. The haakaa is a manual silicone breast pump. Essentially, it’s a suction cup that gently attaches to the breast your baby isn’t attached to and catches the milk that would otherwise go to waste. Then, you store this milk in the fridge and use it later.
When it comes to breastfeeding, every drop counts, and the haakaa helps make sure you don’t waste any of those drops.

Whether you WFH or you’re back in the office, the cause for your lower back pain can oftentimes be attributed to your 9-5. If your job requires you to be on the computer, chances are you’re not moving enough throughout the day. We’re stuck in pretty static positions for about 8 hours, and performing repetitive motions that misalign and strain our muscles. I think a lot of us know that- but what can we do about it?
The answer: improve your posture by activating and strengthening those weak and neglected muscles. You can do that by 2 pretty simple means:
The thought of having to incorporate those moves into an already packed and stressful day can seem taxing for some- but they can help your back pain, and may even help decrease your stress levels. You can do them first thing in the morning, during your breaks or even at night before bed.
I’m all for taking baby steps to get the ball rolling, so let’s start with stretches (sometimes these can seem less daunting than “exercise“):
1. Spinal Twist: can help relieve tension across entire back
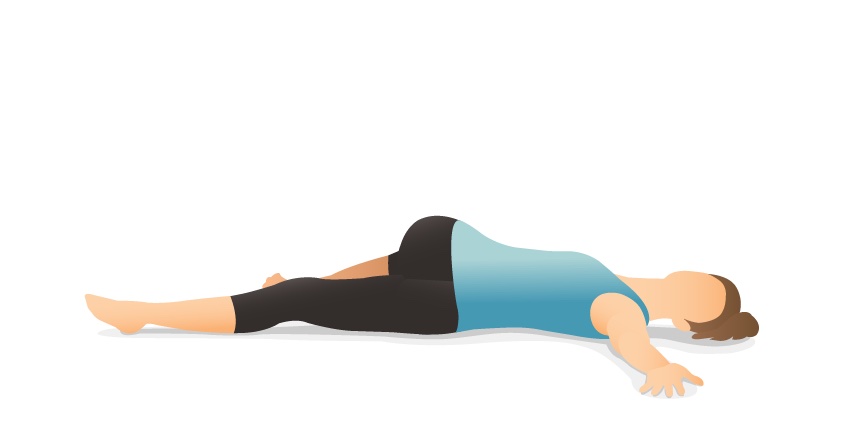
How to do it at home (on the floor): Lie on your back with your legs flat on the floor. Bend your left knee, while your right leg remains flat, making contact with the floor. Bring your left knee in towards your chest, take a deep breath, and as you exhale, cross your left leg over to your right side. Hold this position for 15-30 seconds, taking deep breaths and gently pushing your left knee closer to the floor on the right side. Repeat on the other side.
How to do it at your desk: Sit upright, placing both feet flat on the floor. Rotate your upper body toward the left. Place your right hand on the outside of your left knee, and continue rotating your torso to the left, pushing into the stretch. You can use your left hand to deepen the stretch by placing it on the edge of the backseat of the chair or the armrest. Hold this position for 15-30 seconds, taking deep breaths, and pushing deeper into the stretch with each exhalation. Repeat on the other side.
2. Hip Stretch (aka Figure-Four Stretch): can help release hip tightness

How to do it at home (on the floor): Lay on your back, and bend both knees. Cross your right ankle over your left knee. Clasp your hands behind your left leg and draw that left knee in towards your chest as far as you can comfortably go. Hold this position, feeling the stretch in your right glute, for at least 30 seconds. Take deep breaths, deepening the stretch with each exhalation. Return to your original position and repeat on the other side.
How to do it at your desk: Sit upright on your chair, with both feet flat on the floor. Cross your right ankle over your left knee. Bend forward at the hips until you feel a stretch across your right glute. Hold this position for 15-30 seconds taking deep breaths, and pushing deeper into the stretch with each exhalation. Return to your upright seated position with both feet on the floor, and repeat on the other side.
3. Hamstring Stretch: can loosen tight hamstrings that pull at your pelvis, causing pain/stiffness in your back.
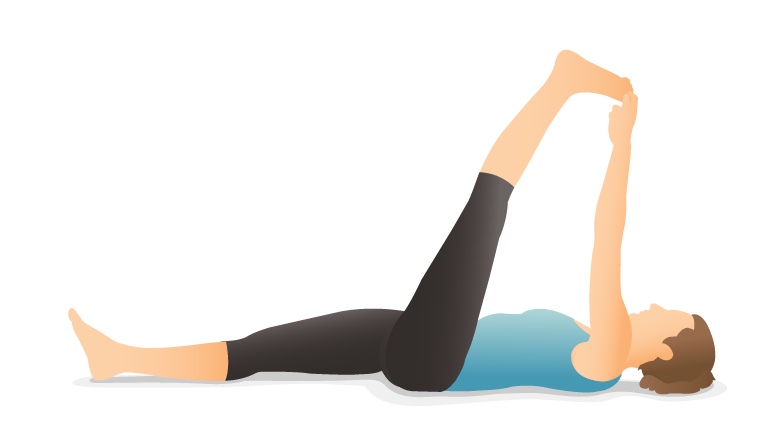
How to do it at home (on the floor): Lay flat on your back, with both legs straight. Raise your right leg straight up towards the sky, and using your right hand, grip your big toe, pulling your knee closer to your chest (maintaining your leg as straight as possible). If you are unable to reach your toes with your hand, use a towel, loop it around your right foot and slowly pull the towel towards you. (If you can’t find an appropriate towel, you can also invest in a stretch strap, like this one). Keep your opposite leg flat on the floor in its original position as you draw the towel towards you, moving your right leg towards your head. Keep pulling until you feel the stretch behind your thigh. Hold this position for at least 30 seconds. Make sure to breathe deeply during this stretch, and try to deepen it with every exhalation. Slowly release the towel and return your right leg to the original position. Repeat with the left leg.
How to do it at your desk: Sit upright in your chair, with both feet flat on the floor. Make sure your chair is stable, and won’t move around. Extend your left leg forward while maintaining your right leg and foot in its original position (right foot flat on the floor). Keep yourself in an upright position, sitting tall with your head in line with your spine, and fold forward, reaching for your left foot. Hold this position for 15-30 seconds, deepening the stretch with each exhalation. Slowly come back to your original position, and repeat with the other side.
You can do all of those stretches, or pick out 1-2 for the day. Just dedicate at least 1-2 minutes to holding the stretch, and then see how good you feel after.
Now here are some great foundational exercises that you can use to strengthen your muscles and counteract those pains:
1. Bird-dog: helps stabilize your abdominal muscles, lower back, butt, and thighs
How-to: Start on all fours, hands and knees on the ground. Tighten your abdominals as you extend one arm out in front of you and extend the opposite leg out behind you at the same time, forming a straight line (if you extend your right arm out, extend your left leg). Keep your hips stable, and squared to the ground. Hold this position for 5 seconds, and return your hands and knees to the ground. Repeat on the other side. Keep your abdominals engaged throughout the exercise to ensure you minimize any motion in your hips as your weight shifts. Aim for 3 sets of 12.
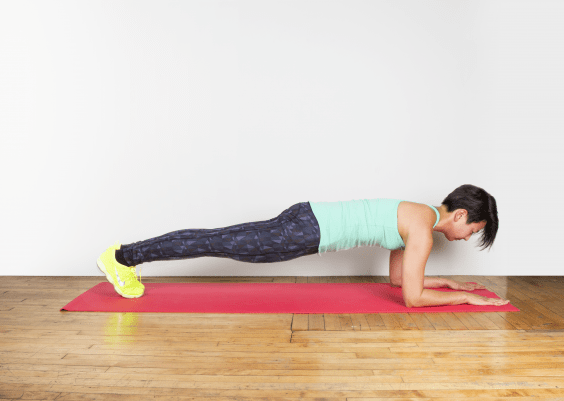
2. Plank: your core is connected to your back, and this exercise will help strengthen both
How to: Start in a push up position, with core engaged. Bend your elbows until your forearms are laying flat on the floor (elbows under your shoulders and hands flat on the floor). Your body should form a straight line from your head to your feet. Look at the space in between your hands to ensure your spine remains neutral. Hold this position for as long as you can (about 30 seconds to 1 minute). Aim for 3 sets.
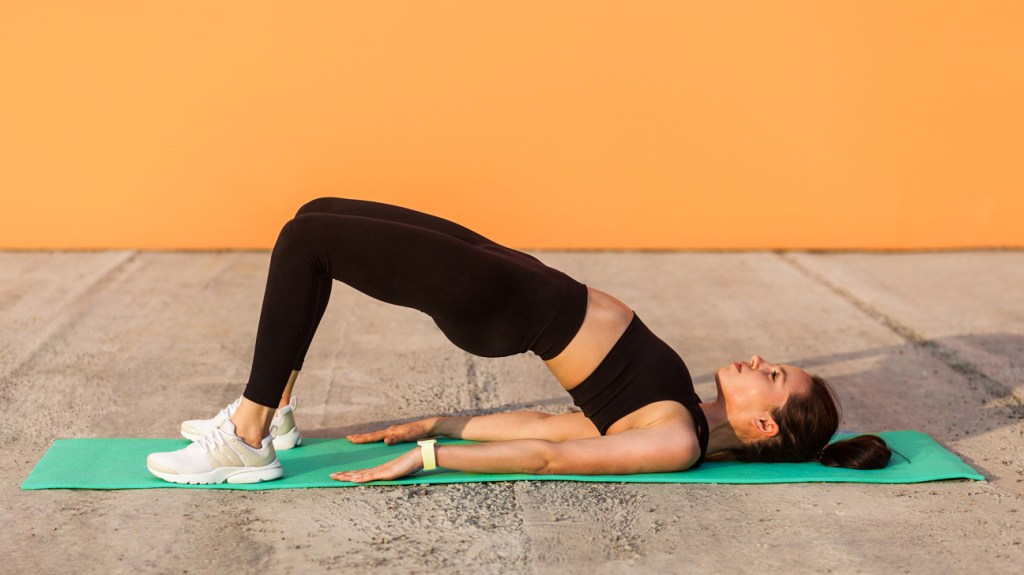
3. Glute Bridge: stable, strong glutes= stable, strong hips and pelvis = increased stability and better posture
How to: Lie on the floor, knees bent and feet flat on the floor, hip-width apart. Make sure your back is also flat against the floor. With your hands by your side, tighten your abdominals and glutes, press your feet into the floor, and lift your butt off the ground. Ensure you keep your upper back, shoulders and head on the floor. The goal is to form a straight, diagonal line from your knees to your shoulders. Hold this position for about 15 seconds, breathing deeply. Start with 3 sets of 5, and work your way up as you see fit.
4. Supermans: strengthens your back extensors that help stabilize your spine and keep you upright
How to: Lie on your stomach, with your legs straight, and your arms extended out in front of you. Lift your hands and feet off the ground simultaneously until you feel your lower back contract (your limbs may lift about 5 inches off the floor before feeling this). Engage your core, lifting your belly button up towards your back. Look at the floor to keep your head neutral and avoid straining your neck. Hold this position for 2 seconds. Slowly release. Repeat 5-10 more times.

Incorporate some of these moves into your daily routine, be mindful of your posture throughout the day, and frequently adjust your position while sitting for long periods to help improve your back pain. Getting up from your chair and periodically walking around may also be helpful. If you’re down to reinvent your workplace, you can feng shui your work space to be more ergonomically-friendly, or you can invest in new pieces all together (hello, standing desk!).

Let’s face it, we live in a society where stress is romanticized. The harder you work, the less time you sleep, and the more ink that drowns out the pages of your planner are now factors that indicate how productive you are. Your social media feeds are flooded with early risers who are telling you 5am isn’t an early enough time to get up and get your day started. Some people thrive on this type of energy, but for those of us who don’t- it leads us to feeling burnt out, or just guilty. There is nothing bad about taking a moment to pause and breathe.
Especially now, after almost 3 years of covid mandates- lock downs, restrictions, and essentially becoming hermits- social interactions can take a toll. Our stamina isn’t quite as vigorous as it was before. With that said, the point of this post is to remind you that it is more than okay to take a pause. I’d recommend taking a whole Sunday to recharge, but for some, this can actually add to the Sunday scaries, so another effective way to reenergize is to spread self-care habits throughout the week. Start and/or end your days with some of the recommendations below, or establish a mid-week chunk of time to them. Either way, whether you sprinkle these habits in slowly, or submerge yourself entirely, you will likely notice a difference.
For starters: put your phone away. Dedicate this time to yourself- and only yourself. Cut yourself off from the world- no calls, texts, comments, DMs, tweets and any social media ingestion. And if you have anxiety about emergencies, here’s a tip: set your phone on “do not disturb,” but “allow notifications” from people you know you wouldn’t want to miss (e.g., parents, kids). Now, set your phone on its charger, away from you. I know it’s difficult to disconnect- we are literally wired to need our phones now (perhaps a topic for a different blog on another day?), but it’s absolutely required to fully commit to focusing on yourself.

Happy relaxing!
One of the things I picked up on, while working at a COVID-19 clinic, was that many people weren’t sure of their symptoms and what they meant. During early covid, it was pretty common to lose your taste and smell, but as newer variants developed, covid began to look a lot more like allergies or your typical upper respiratory infection (URI). With that said, it’s important to keep in mind that there are still many individuals that can react to a covid infection much more severely, and we still don’t know the significance of long-term covid effects, so it is important to continue taking the appropriate precautions (wearing a mask, proper hand hygiene, avoiding poorly ventilated or overcrowded spaces, and getting vaccinated).
If you start feeling symptoms, it’s important to first take a COVID-19 test (the government has supplied 2 sets of 4 free at-home tests, so if you haven’t received yours yet, make sure to click here to order them).
If you test positive: isolate for 5 days, and if your symptoms have resolved or improved by then, you can end isolation, but make sure to mask for an additional 5 days after. If your symptoms remain moderate on day 5, isolate up to 10 days. Of course, if you notice severe symptoms, such as shortness of breath, chest pain, or a blue tint to your skin or lips- those are indications that you should visit the ER.
If you test negative, your symptoms could indicate you have a cold, likely caused by a different virus, or allergies. Here is how to tell the difference:
Typical allergy symptoms:
Typical cold symptoms:
And here are some tips on how to find some symptom relief:

For allergies:
For colds:
This is just a quick cheat sheet to help determine what you might be battling. If you notice that your symptoms persist for more than 14 days, you could have a bacterial infection, so make sure to reach out to your doctor to receive the appropriate treatment and antibiotics.
